Basic Sine Generation
Note
This tutorial is applicable to all SHFSG+ Instruments.
Goals and Requirements
The goal of this tutorial is to demonstrate basic sine generation with
SHFSG+. We demonstrate how to configure the sine generator to produce a single frequency component at the desired frequency in the range 0 GHz to 8.5 GHz. In order to visualize the multi-channel signals, an oscilloscope with sufficient bandwidth and channel number is required.
Preparation
Connect the cables as illustrated below. Make sure that the instrument is powered on and connected by Ethernet to your local area network (LAN) where the host computer resides. After starting LabOne, the default web browser opens with the LabOne graphical user interface.
Note
The instrument can also be connected via the USB interface, which can be simpler for a first test. As a final configuration for measurements, it is recommended to use the 1GbE interface, as it offers a larger data transfer bandwidth.

The tutorial can be started with the default instrument configuration (e.g. after a power cycle) and the default user interface settings (e.g. after pressing F5 in the browser).
Generating a Sinusoidal Signal
Note
This tutorial focuses on how to use the sine generator to produce a signal at a single, continuous frequency without any AWG control. This mode of operation is distinct from the method of modulating the output of the AWG output described in the Digital Modulation Tutorial, and the two approaches generally do not need to be employed simultaneously.
In this tutorial we generate a continuous sinusoidal signal at a single frequency and visualize it with a scope. In a first step, we use the Output Tab to enable the Output of the SHFSG+ and set the Output Range. We also set its RF Center Frequency to 1 GHz. Depending on the desired center frequency, either the RF or LF paths can be used. In this example, we will use the RF path, but the LF path can also be used for center frequencies in the range 0 - 2 GHz. Additionally, we configure the scope with a suitable time base (e.g. 500 ps per division) and range (e.g. 0.2 V per division). The following table summarizes the necessary settings.
| Tab | Section | Label | Setting / Value / State |
|---|---|---|---|
| Output | Signal Output 1 | On | ON |
| Output | Signal Output 1 | Range (dBm) | 10 |
| Output | Channel 1 | Center Freq (Hz) | 1.0 G |
| Output | Signal Output 1 | Output path | RF |
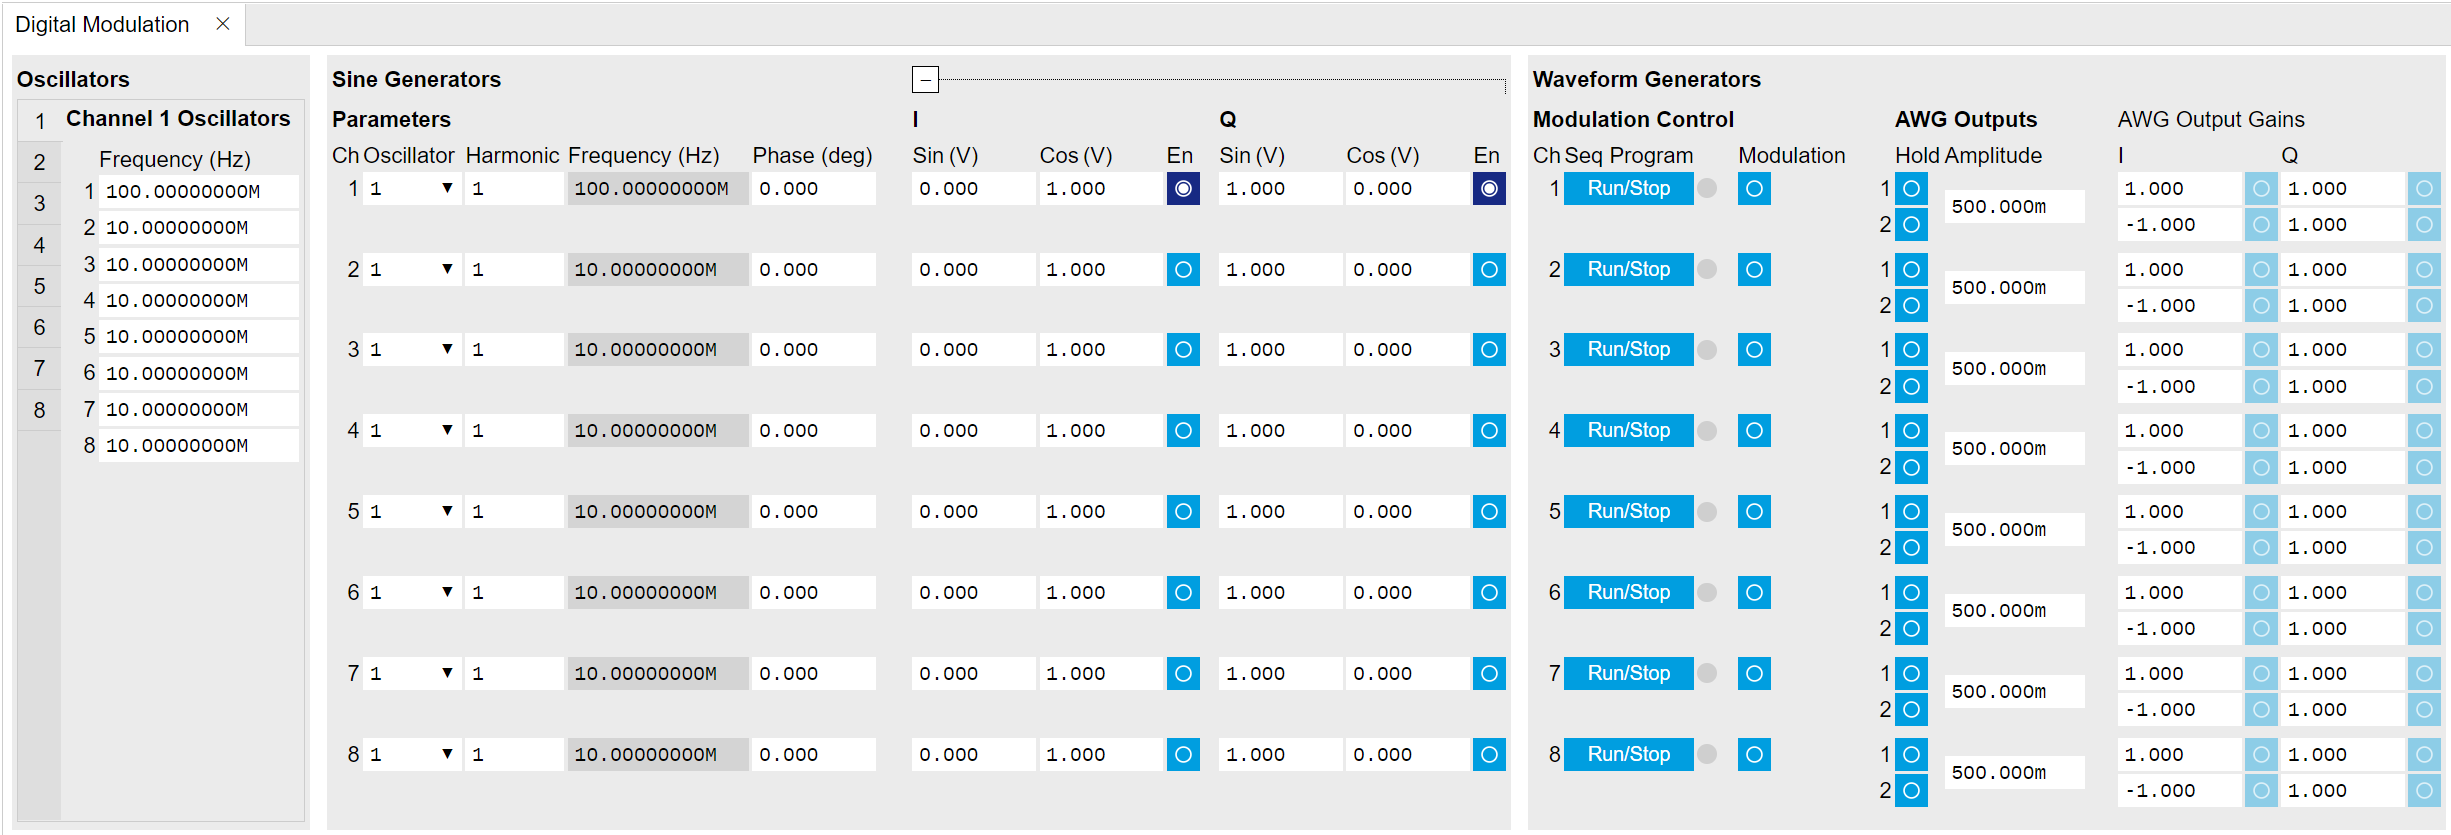
In addition to turning on the output, we must also configure the sine generator. We set the amplitudes of the I and Q components to yield a single sideband signal, and we set the oscillator frequency to 100 MHz. We also enable the I and Q signals so that an output signal is actually generated. With the RF center frequency set at 1.0 GHz and the oscillator set to 100 MHz, the final output frequency is 1.1 GHz.
Note
To access the I and Q settings of the Sine Generator, it is necessary to expand the menu in the Sine Generator section of the Digital Modulation Tab. The settings are collapsed by default.

| Tab | Section | Sub-section | Label | # | Setting / Value / State |
|---|---|---|---|---|---|
| Digital Modulation | Channel 1 Oscillators | Frequency | 1 | 100 M | |
| Digital Modulation | Sine Generators | Parameters | Oscillator | 1 | 1 |
| Digital Modulation | Sine Generators | Parameters | Harmonic | 1 | 1 |
| Digital Modulation | Sine Generators | I | Sin(V) | 1 | 0.0 |
| Digital Modulation | Sine Generators | I | Cos(V) | 1 | 1.0 |
| Digital Modulation | Sine Generators | I | En | 1 | ON |
| Digital Modulation | Sine Generators | Q | Sin(V) | 1 | 1.0 |
| Digital Modulation | Sine Generators | Q | Cos(V) | 1 | 0.0 |
| Digital Modulation | Sine Generators | Q | En | 1 | ON |
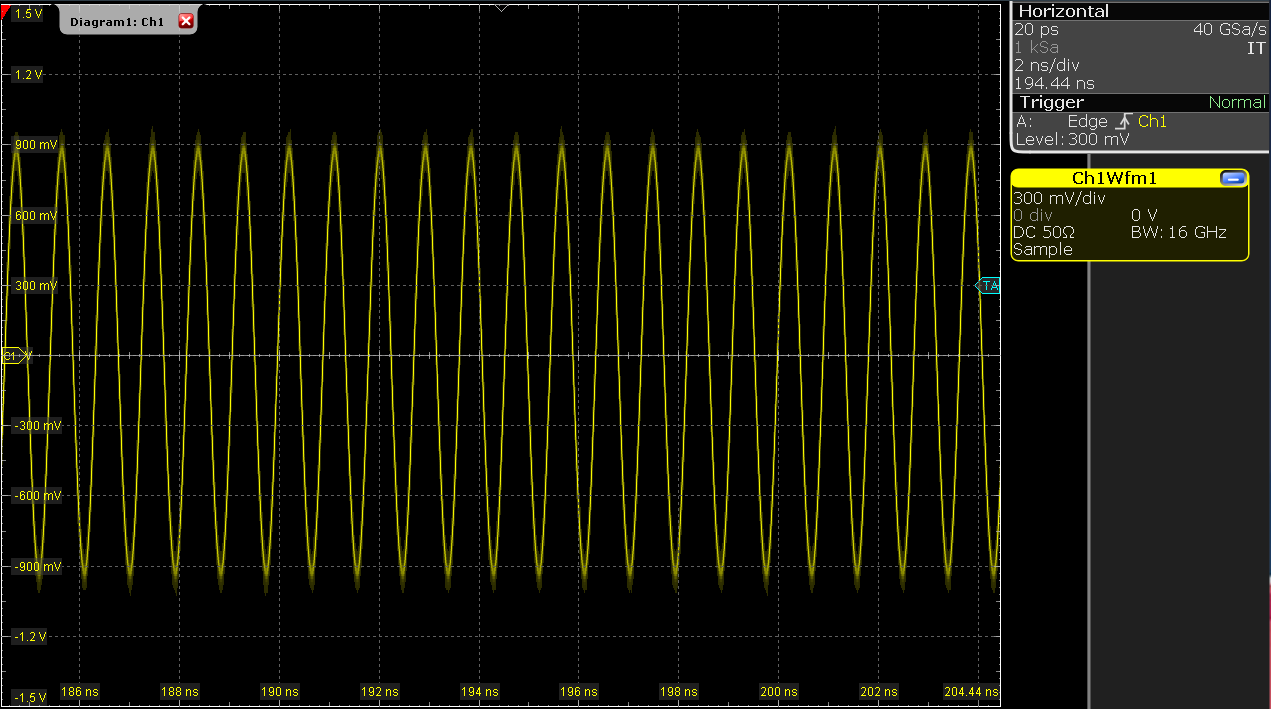
With these settings, we observe a continuously playing 1.1 GHz signal on the scope.

Note
The oscillator used for the sine generation, its harmonic, and the phase of the sine generator can be used to further customize the output signal of the sine generator.